Showing posts with label vegetables. Show all posts

Tuesday, September 4, 2012

No dig potato harvest

If you have been wondering about my no dig potato experiment went, I'm pretty disappointed.  I only got a small bucket of salvageable potatoes.  The rest were so tiny
that there was no point in picking them up.  Many of them were also pretty large but rotten and partially eaten.  I'm not entirely sure why this was, but I'm going to do some research and figure out what I need to do differently and try it again next year.  It wasn't a total failure, I did get some potatoes and I learned that I can't do things quite how I did them this year.  I also knew going in that I had not made any amendments to the straw I used and that there may not be enough nutrients for the potatoes.  I like to try things out bare bones first to see if they can be done that way.  This doesn't seem to be one of those things.  There were also many potatoes that could potentially have grown bigger had I let them go longer.  However, many of the potato plants were ready to be harvested, so I harvested them all.  The one thing I did get out of this garden bed was good, healthy soil full of good bugs .  If you look at the picture above, you can see how rich the soil is that was left behind.  Not a waste at all.
 Either way this was a learning experience.  I started this blog when I did, before I have my future homestead, because I wanted to share these learning experiences with everyone.  I like to learn as much as I can now, before I am on my own homestead so I know more of what I need to do when I get there.  Not that things will be perfect, but I will know more than I would have if I chose to wait for the real thing.  That, I believe, is the most important step I can take to being successful at homesteading.  I hope I am right, we'll find out soon enough.

Wednesday, August 29, 2012

Seed saving: Squash and Pumpkin

Saving seeds for squash is basically the same for all different kinds.  All you have to do is pull the seeds out of the squash before you eat them.  Don't cook the squash first because it will kill the seeds.  The squash should be nice and ripe before you pick them as well.  The best way to be sure that the seeds themselves are nice and ripe for saving, leave the squash to grow on the vine a little longer than you normally would for eating.  You can still eat the squash, it just may taste a little different than the ones you pick nice and small.
Once you remove the seeds from the squash, get rid of all the squash pulp attached to the seeds.  I put the seeds into a colander and rinsed them off really well.  If there is a lot of pulp, you can soak the seeds overnight first.  The smaller seeds and the flat seeds aren't the ones to save.  You can roast and eat these.  The nice, big, plump seeds are the good ones.  Once they are clean, let them air dry really well.  Store in an air tight container like a glass jar.  As with any kind of seed, try to save the seed from multiple plants, not just one.  That way you have a good variety of seed to plant.  That's it.  Seeds all ready for next year (for free)!
I have to add that after my seeds dried I noticed that most of them were pathetic, flat, non viable seeds.  This is because I picked the squash too early.  I figured that this could be a problem, but figured I would try anyways.  Next time I won't bother.

Monday, August 27, 2012

Harvesting zuchetta

young rampicante
Zuchetta rampicante is a unique type of squash.  It can be harvested and used as a summer squash or as a winter squash.  I picked this squash in the picture when I took the picture.  I used it as a summer squash and sauteed most of it for my lunches.  It lasted me quite a few lunches as it was at least two feet long.  I would cut off a hunk of the squash and it would ooze a little and then seal over until the next time I wanted some.  I stored it on the counter for two weeks like this as I ate it.  Once I hit the seeds in the bulge at the end it when it did not store any longer.  I ended up with a mold spot the day after I got to the seeds.  I cut that part off and put the rest in the fridge.  I did notice that many of the seeds were pretty immature, and I would like to save seeds, so I will be sure and let at least one of these squash grow on the vine much longer.  I can use that squash as a winter squash.  As the squash get older on the vine, they develop a thicker skin like a winter squash would.  Apparently, the squash picked when they are older can store quite a while just like a winter squash.  I plan to test that theory this year.  I will continue to grow this kind of squash either way because it has proven itself to be a valuable addition to my garden and my kitchen so far.

Monday, August 20, 2012

Dehydrating hot peppers

Dehydrating hot peppers was a very simple process minus one small factor.  Hot peppers contain capsaicin.  This is what is in the peppers that makes them hot.  When you are cutting the peppers, DO NOT touch your eyes without scrubbing your hands first.  You may know this already, but do you also know that when you dehydrate the peppers the fumes can burn as well?  Move your dehydrator to a very well ventilated area, even outside, before you start.  That being said, the rest is really basic.  Cut your peppers up and remove the seeds.  Lay them out nicely, not overlapping, on the dehydrator sheet.  I set mine to about 110 degrees and it took somewhere around 12-14 hours.  You can turn the heat higher and it won't take as long, but I prefer to use a lower heat.  The reason being that at a lower temperature you kill less of the good stuff, like enzymes, in your peppers or any vegetables or fruits for that matter.  I'm not sure this works with meat as well, so do your research before trying the low temperature on meat.  When they are nice and dry, store them in an air tight container, preferably a glass jar.  That's all there is to it.
What do you do with hot dry peppers?  I was wondering that myself and so I did some looking around online to see if people actually stored hot peppers this way.  Lots of people do apparently.  Dried hot peppers make an excellent spice.  Depending on what kind of peppers you dry, you can make things like chili powder or crushed red pepper to season your meals.  Never have to buy these spices from the store again!

Wednesday, August 15, 2012

Volunteer butternuts

While looking through my cucumber plants and fixing them to the trellises, I noticed a funny looking cucumber plant.  It had very large leaves and very large flowers.  I thought it may have been a vine off of my zuchetta, but it had a base right in the middle of the cucumber patch.  As I continued to check it out, I noticed that there were some small fruits on the vine and that they looked an awful lot like butternuts.  I don't plant butternuts in my garden because the squash vine borers always decimate any squash or zucchini I have ever tried to grow.  I pretty much have no idea how they got there.  They were able to start growing with my noticing because when they are smaller they looked enough like the cucs to go unnoticed to a busy gardener.  It wasn't until we got a good rain recently that they started to grow so wildly.  I assume the seeds got there from the compost I spread all over this area at the beginning of the season.  So really, they could be any weird kind of squash that I may have bought from a variety of places.  Either way, I have fruit on the vine so it will just be one more winter squash that we have to eat.  You can never have too much winter squash!

Tuesday, August 14, 2012

Zuchetta (trombino) progress


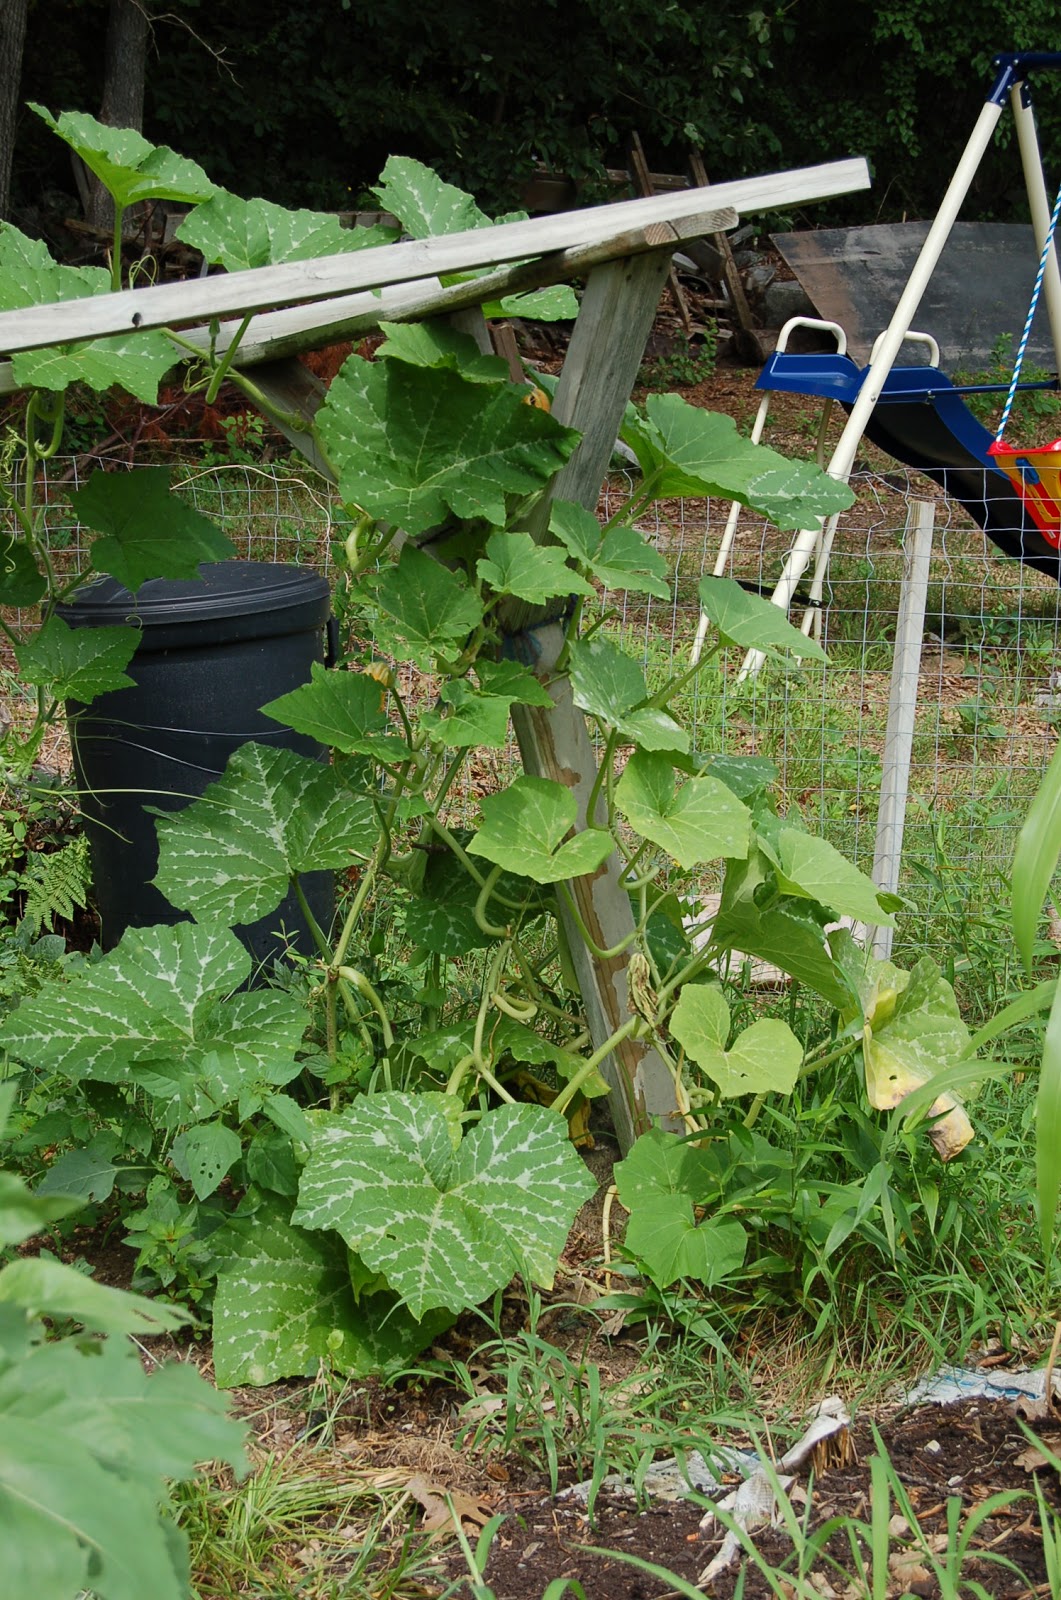
The zuchetta have finally started growing up to speed.  They did start off slowly, as I read they would, and now they are going crazy.  I have had to go out and wrap them around the trellis a time or two and they don't really seem to like it.  They don't want to stay there and there are root buds all over the place.  I did a little more reading, and it turns out that if you let them grow on the ground, they will be more productive.  I decided that I would let the vine at the middle of the trellis drop down to the ground and see what happens then.  I had seen quite a few 
fruits starting at one point, but I can't seem to find them anymore.  I'm not really sure why, but I am getting a few large fruits so I'm not too worried.  I will be going out to give the squash some compost this week, so maybe that will help to get me some more fruits.
I have been inspecting the plants almost daily looking for the vine borer damage that I am hoping to avoid by growing the zuchetta.  I have found a couple of suspicious spots, but upon further inspection can find no borers.  There are a couple yellowing leaves at the bottom, but the stem of the plant seems untouched.  A couple of the leaves even had that vine borer sawdust type look that I have seen so many times before but the spots aren't where I would expect them to be normally.  I have cut this part of the leaves open and found nothing.  So far it seems that the borers have not touched my zuchetta.  I'm not sure if this is just because they are zuchetta or because I got them in the ground a little late.  I have yet to notice any vine borer damage on my other squash, so who knows.  Either way, I get to have some squash from my garden this year.  Finally!!


Thursday, August 9, 2012

Dehydrating zucchini and summer squash

Zucchini and summer squash are a simple vegetable to learn how to dry with.  These squash are all sliced to about 1/4 inch and spread out nicely on the dehydrator tray.  Then all I did was set the dehydrator to the vegetable setting (about 120 degrees) and then set the timer for about 8 hours.  Very simple process.
So what do you do with dried zucchini and summer squash?  You could eat them like chips, but I didn't really love the chips.  I plan to store them away for a cold winter day and throw them in a lovely vegetable soup.  They will reconstitute very nicely and make a lovely addition to my soup.  Just remember that when you add them to your soup that dehydrated vegetables are much smaller than their reconstituted counterparts.  They will soak up water and get much bigger so don't add too much!!

Monday, August 6, 2012

Who is eating my tomatoes? Hornworms.

Ever gone out to your garden to find the tomato you were hoping to eat with a large bite taken out of it?  I have lost about eight tomatoes so far this year to this pest.  The large

bite is actually many little bites taken by a tomato horn worm.  They creep around on your tomato plants and eat just enough of your big beautiful tomato to cause it to fall off of the vine and rot on the ground before you can eat it.  They blend in fairly well so unless you are aware that they are around you may never see them.  I found this one while picking cherry tomatoes last night.  It was just sitting there not moving so I guess
that night time is a good time to find them.  I have also gone out in the morning to find them and if you are quiet enough you can actually hear them crunching away on your precious tomatoes.  If you look at the picture to the right, you can see the bites taken out of the unripe cherry tomato.  I snipped the branch off to dispose of this nasty thing before it got to anymore of my babies.  I also found one other horn worm
 tonight.  It, however, has succumbed to organic pest control. The little white things hanging from this worm are parasitic wasp eggs.  When the eggs hatch, they will eat the horn worm which means that the horn worm can no longer eat tomatoes. All you need to do to get the parasitic wasps to come to your garden and eat your caterpillars is to feed the adults.  They need flowers that their tiny little heads can get to.  Yarrow, mallow, parsley, angelica, and marigolds are all good potential food sources for parasitic wasps that I have in my garden.  Other good options are dill, cilantro, fennel, alyssum, and queen anne's lace.  If you find a hornworm that looks like this one, loaded with parasitic wasp eggs, leave it in your garden.  The one I found without any eggs I got rid of, but you want to keep this one.  Once the eggs hatch, they will turn to adult parasitic wasps and they do a much better job finding caterpillars than you ever could.  I doubt they can do too much more damage once they are infested.  I was very excited to find this in my garden. I would have been more excited to find ripe tomatoes I could eat, but at least the problem was being dealt with.

Friday, August 3, 2012

Planting for a fall crop

This picture is taken underneath the area in the garden where the beans and tomatoes are growing.  They form this great shaded area where moisture is retained in the mulch well enough for mushrooms to grow.  The grey thing towards the middle is actually a little volunteer mushroom.  This means to me that I did a good job with the mulch and the additional help from the shade layer is retaining plenty of moisture for my plants.  Hopefully, this should also be enough moisture for me to plant a fall crop among these plants.  I have always failed in my attempts at growing a fall crop in the past because I'm not good about remembering to go out and water the new seeds.  If fact, I rarely water my garden at all.  That is why it is important for me to use as many methods as possible to retain water.  It looks like this year there may finally be a good set up for my fall plants to be able to sprout.  I planted radish, turnip, lettuce, spinach, and kale.  The plan is to throw the seeds around with a little soil cover and then wait and see if I set things up for them well.  I also planted quinoa among my corn and nasturtiums.  That may have a harder time since the corn doesn't provide as nice a shade layer as the leafy tomatoes and beans.  As the plants start sprouting and the beans are finishing up providing, I will slowly cut them back so the strong plants underneath can get the sun that they need.  The bean plans I cut will be spread on the ground around the fall crop to continue retaining water for the new plants.  The roots of the beans will stay in the ground to break down and provide organic matter for future plants as well.  Bean roots are extra nice because they have the nitrogen nodules on the roots that are so good for the future plants as well.  Well this all sounds good in theory, we will soon see if it is going to work well or not.

Thursday, July 19, 2012

Seed saving: Amish snap peas

The easiest kinds of plants to learn to save seeds for is peas and beans.  If you already save dried peas or beans, do exactly the same thing but save the beans or peas to be used as seeds.  If you are unfamiliar with this process, it is very easy.  The pea pod in the picture is an Amish snap pea.  As the season for them passed, I left quite a few pods on the vine to dry.  Once the vines are completely dead and the pea pods are dried, then collect them.  This may be a month or so after you would normally harvest them to eat.  Then all you need to do to get to the seeds is simply pop open the pod without sending the peas flying everywhere.  Be sure that the peas are completely dry and store in an air tight glass container.  These seeds can store well as long as five years.  Beans and other kinds of peas are saved exactly the same way.

Wednesday, July 18, 2012

My vegetable garden: Zuchetta rampicante (trombino squash)

My garden has a horrible squash vine borer infestation.  I have not been able to grow and kind of squash or pumpkins in at least three years.  I have tried all the methods of getting rid of these pests, and none of them really did any good.  I split open vines and killed the borers one by one.  I started two rounds of squash using one as bait that I pulled out and burned with the intention of leaving the second batch in safety.  I tried row covers.  Then I gave up.  No squash at all last year.  This past winter I learned about zuchetta rampicante.  They are supposed to be naturally squash vine borer resistant.  This is plenty of reason to plant them for me, but they also have many other good reasons to plant them.
Zuchetta is a summer squash that vines and stores like a winter squash.  Rather than growing in a bush like most summer squashes, it is a vining plant grows up trellises and fences.  This may help in its vine borer resistance.  When you pick them, they have the soft skin of a summer squash, but the skin can harden so that they can be stored like a winter squash.  They apparently store so well that you can cut off one end and the cut piece will form a sort of seal so that the rest wont go bad.  The fruits can get up to three feet long and one plant can produce 20 squash.  I read that they taste similar to zucchini, but haven't been able to taste any just yet.  The vines themselves started fairly slow, but are beginning to take off quite quickly up my old grapevine arbor.  I did help them up it a little by tying them to it since there aren't any places for them to grab on the arbor.  I will post an update when I (hopefully) have some squash to show.