Thursday, August 30, 2012
Worm bin or not?
It seems to me that a worm bin is one of those things that you are supposed to have when you are living on any type of organic farm. I built one a couple years ago and I'm not really sure if I want to keep it or not. It seems to me that it is extra work and extra space that is just not necessary. I do get good castings and good compost tea, but in small enough quantities that I can't really do much with it. I could build a much larger bin, but I'm not sure I could then feed it well enough. There are only three of us in the house right now so we really don't produce much scraps. Every time I feed the worms, I have to put all new bedding down which does take up some time as well. I think that throwing all my kitchen waste into my kitchen scrap composter is far less work and I seem to get just as good fertilizer out of it. I also get it in much larger quantities when I go to use it because the can is much larger. If you lived in a place where you didn't really have much yard space, a small worm bin could be ideal, but I think I'm going to just stick to a bigger, "lazier" type composter for my house. Half of the idea of permaculture seems to be less work for more gain anyways. Set things up so that they are efficient and mostly function on their own. The worm bin doesn't do that for me.

Wednesday, August 29, 2012
Seed saving: Squash and Pumpkin

I have to add that after my seeds dried I noticed that most of them were pathetic, flat, non viable seeds. This is because I picked the squash too early. I figured that this could be a problem, but figured I would try anyways. Next time I won't bother.
Tuesday, August 28, 2012
Mead making part two
Now that your fruit and water mixture has been sitting for 7-10 days, its time to strain it and
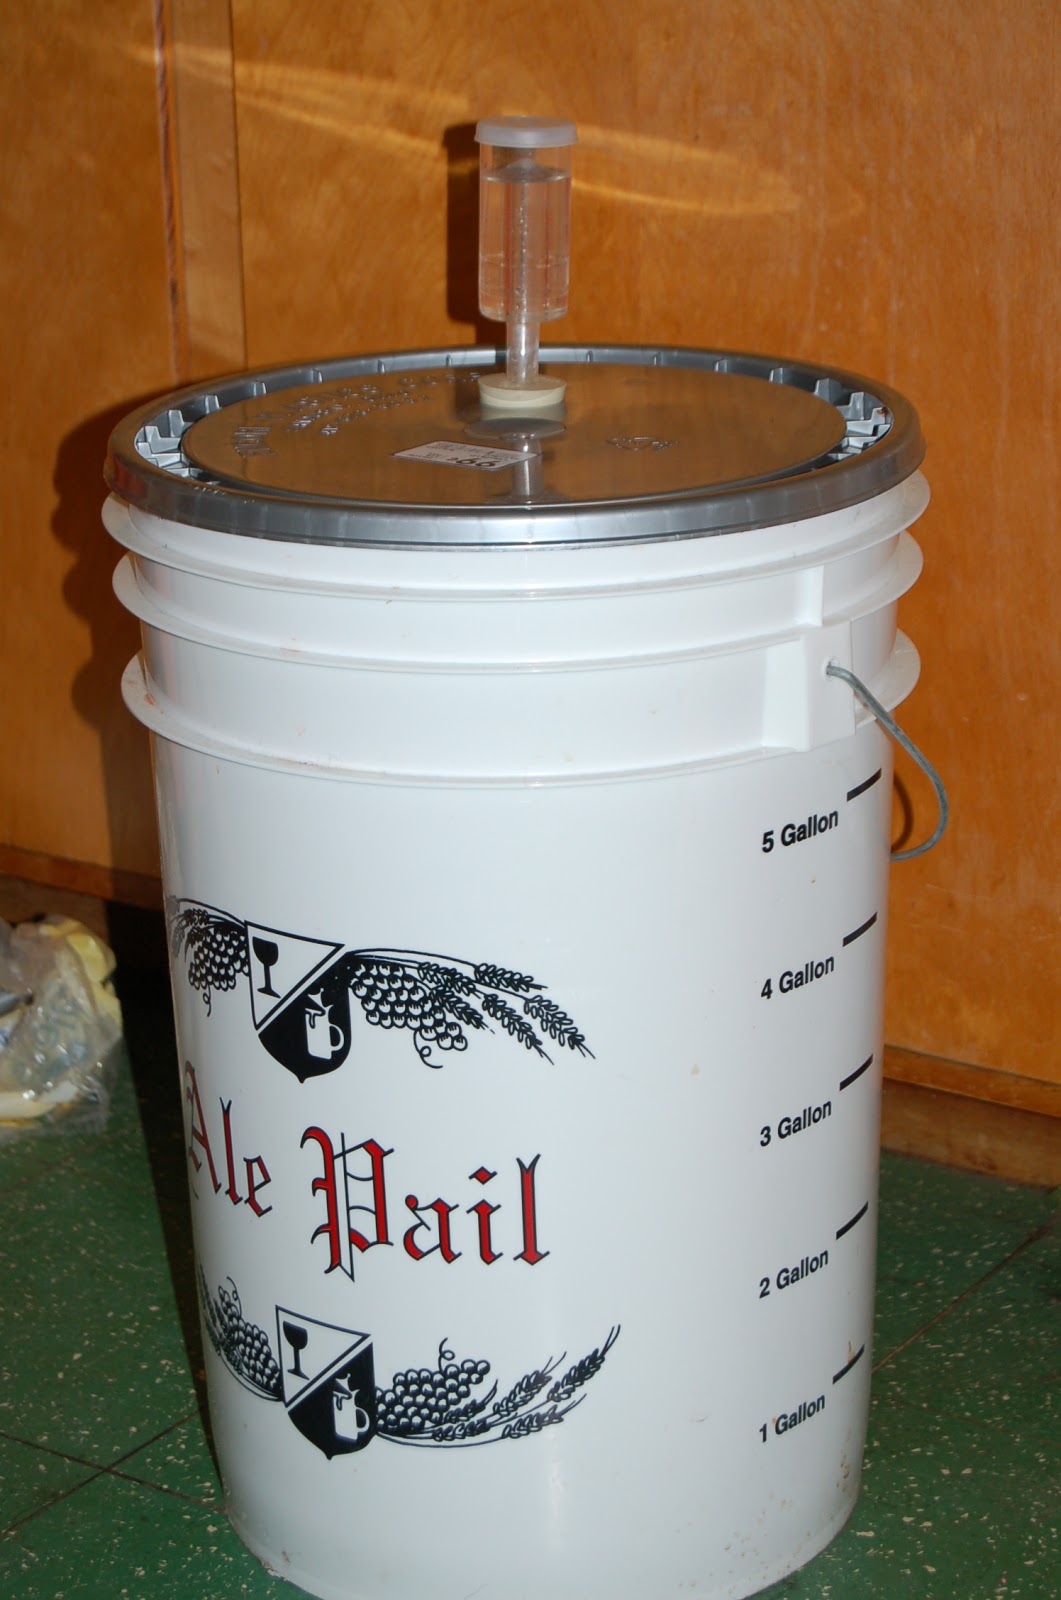
 add the honey and nutrient. I take a large bucket and put a strainer across the top. I then put a piece of cheesecloth over the strainer so that all the little pieces get strained out of the liquid. Once I dump all the liquid through the strainer, I let it sit for a couple hours to be sure that all the juice gets out of the pulp. Next I add the honey. The recipe calls for 3 lbs of honey per gallon of the final amount of mead. Since this is going to be a 5 gallon batch, I would use 15 lbs of honey. However, since watermelon is very sweet, I'm going to try to only add 2 lbs of honey per gallon for a total of 10 lbs. This should make the mead more flavorful and less percent of alcohol. This should still be
 plenty strong enough because the standard 3 lbs per gallon makes fairly strong alcohol. I have yet to actually measure the alcohol content of my mead, but it is obviously quite potent. I like to add the honey when it is slightly warm so that it blends in well. It shouldn't be hot because it will kill the yeast. The next thing you add is the yeast nutrient. The kind I have says to add 1/2 teaspoon per gallon, but a different kind may vary in amount needed. Mix this all up really well and put the lid on the bucket with the airlock in place. At this point you do not want any bacteria getting into your mead because you could end up with vinegar. Let this mixture sit in the bucket for another 7-10 days and stay tuned for the next step!

Monday, August 27, 2012
Harvesting zuchetta
 |
| young rampicante |
Friday, August 24, 2012
My vegetable garden: Trail of Tears, dry pole beans

I grew pole beans last year and did not like the taste at all. I talked to a few other people and it turns out, no one I could find really liked the taste of pole beans. I really like the idea of growing vertical for saving space, so I was disappointed that the beans I could grow vertical weren't really all that good.
Then I discovered Cherokee Trail of Tears beans. They were dry black beans that I could trellis. I am hoping that because they are on a trellis, that they can dry on the vine without getting moldy like many of my dry beans did last year. We had a rainy spell just before the beans were ready for harvest and I ended up loosing some of the beans. So I looked around to see if there were any other kinds of dry beans to trellis, but there were hardly any others. Variety would be nice, but this is a start. We will see how they are doing when it is time to harvest.
The interesting name of these beans also comes with a sad story. The "trail of tears" was the relocation march that the federal government forced the Cherokee people on in 1839. It went from Tennessee to Oklahoma and was a horrible march that lead to much suffering and death to thousands of Cherokees. One of the things these people managed to bring with them was these vining black beans. They were originally called just "bean" but were renamed by the Cherokee people once the march was finally over.
Thursday, August 23, 2012
Cooking in season: Garden Chili

First thing the next day I will turn the low heat back on the tomatoes and cook the beans. Bring them to a boil and them simmer for about an hour. While the beans are cooking, chop up the rest of your vegetables. You can add whatever you have laying around really. I am going to add onion, peppers (hot and sweet), garlic, zuchetta, and some eggplant. I also add chili powder and bulgur wheat. I can't really tell you how much of each I add, I just throw in what I have and then taste as I go to see how the spices are. You can always add more so don't go too crazy initially. Let this cook in the crock pot until dinner time. Be sure to give it a mix occasionally throughout the day. Other vegetables that are good in this chili if you have them are: corn, carrots, parsnips, turnips, spaghetti squash, or anything else really. Just remember when you are adding things that your chili will be different every time, but that is half the fun of making it in season.

Wednesday, August 22, 2012
Kill mulch for bittersweet and ivy?
Around the edges of my garden seem to be a little out of control. I have bittersweet, ivy, and some weird sort of mini rose that are just growing out of control. I considered going crazy one day and digging it all up, but I am about six months pregnant right now so that just isn't going to happen. I have been collecting large cardboard boxes to lay down in the pathways of the garden but I think I could probably use them as a kill mulch for these weeds. I'm not sure that the weeds aren't too much for this sort of a thing, but I am ging to give it a try.
 The spots I am trying to fix are along the side of the house and along the side of a retaining wall. What I did was to dig along the edge of the concrete and bury about four inches of the edge of the cardboard perpendicular to the ground against the concrete. Then I folded the cardboard down so that the rest lay flat on the ground. As the fall comes along I will bury the cardboard with leaves and other yard waste to weigh down the cardboard. Hopefully this will smother all of these weeds and I won't have to spend time cutting them down all next summer. Tune in this spring to see if it worked.

Tuesday, August 21, 2012
Saving seed: Tomatoes

Subscribe to:
Posts (Atom)