This blog is no longer quite what I want in a blog, so I have created a new one.
http://nepermhome.wordpress.com/
Monday, December 10, 2012

Saturday, October 13, 2012
Storing potatoes the wrong way

Saturday, September 22, 2012
Why use "lasagna" no till gardening?
I have already talked all about how wonderful compost is for your garden. For some people, including myself, there is just not enoughroom in your yard to have enough compost piles to feed your wholegarden. So why not just turn your whole garden into a compost pile?
Lasagna gardening or a no till garden does just that. You build up your garden with the same layers of browns and greens that you would in acompost pile and just leave it there. When done well, you can plant your garden right into these piles of compost with little further effort. You don't need to till because the materials will compost and turn into a nice, soft bed for you to plant your garden in. You don'tneed to fertilize because your garden is going to be built out of fertilizer. You don't need to weed as much because the thick layers will block the weeds from growing where they would normally grow. You don't need as much water because the organic composting materials hold much more water than standard garden soil and the water is there waiting for your plants to drink it up. The layers you add on to the garden may even prevent some of the diseases and pest you have had in the past from being able to return to your garden for another year.
I think this coming year I will dive right in and set up my garden this way. Starting when I do my fall clean up. The hope is that I walk out to my garden in the spring and throw the plants in the ground and they are already fed and watered for the majority of the summer. That and I won't have to do much weeding. We will see how this works out.
Monday, September 10, 2012
Refrigerator canning for hot peppers
 |
| Hot peppers in vinegar |
I went looking in my fridge for the peppers I had stored previously to take a picture of for you, but there was a little problem. I didn't take into account that oil solidifies in the fridge. All this means is that you should probably keep at least one jar out for use.
Saturday, September 8, 2012
How to care for your compost pile
Once your pile is built, the only maintenance it needs is water and aeration. The bacteria you have working for you are just like most other creatures on earth. They need water and they need oxygen. If the pile dries up, the decomposition will just slow way down. If there is no oxygen, then the anaerobic bacteria will get to work. These are the bacteria that don't need the oxygen to work. If this is what you have going on, your pile will smell really bad. This is not what you ideally want to have going on.
If you chose a good location, you may not have to water except on the really hot spells. Compost is good at holding water so if it rains often enough, the pile will hold an adequate water supply and won't need much help.
If you keep the size of your pile about a 3 foot diameter, that helps greatly with the aeration of the pile. If it gets much bigger, the surface area to pile ratio is greatly reduced and there is less available oxygen for your pile. Either way you will need to aerate your pile to some extent. The smaller piles are less material to move around and are therefore easier to aerate. The most common method of aeration is a pitchfork. Dig in and throw your pile around. Try to get all of the drier outer material closer to the inside so it can start breaking down too. They do make fancy tools to aerate your compost, but I have found that those work well for a bucket composter or for the edges only of your pile. They don't get the heavier innards of your pile very well. A good old fashioned pitchfork will do the trick perfectly.
If you chose a good location, you may not have to water except on the really hot spells. Compost is good at holding water so if it rains often enough, the pile will hold an adequate water supply and won't need much help.
If you keep the size of your pile about a 3 foot diameter, that helps greatly with the aeration of the pile. If it gets much bigger, the surface area to pile ratio is greatly reduced and there is less available oxygen for your pile. Either way you will need to aerate your pile to some extent. The smaller piles are less material to move around and are therefore easier to aerate. The most common method of aeration is a pitchfork. Dig in and throw your pile around. Try to get all of the drier outer material closer to the inside so it can start breaking down too. They do make fancy tools to aerate your compost, but I have found that those work well for a bucket composter or for the edges only of your pile. They don't get the heavier innards of your pile very well. A good old fashioned pitchfork will do the trick perfectly.
Wednesday, September 5, 2012
Mead making part three

Tuesday, September 4, 2012
No dig potato harvest
If you have been wondering about my no dig potato experiment went, I'm pretty disappointed. I only got a small bucket of salvageable potatoes. The rest were so tiny
 that there was no point in picking them up. Many of them were also pretty large but rotten and partially eaten. I'm not entirely sure why this was, but I'm going to do some research and figure out what I need to do differently and try it again next year. It wasn't a total failure, I did get some potatoes and I learned that I can't do things quite how I did them this year. I also knew going in that I had not made any amendments to the straw I used and that there may not be enough nutrients for the potatoes. I like to try things out bare bones first to see if they can be done that way. This doesn't seem to be one of those things. There were also many potatoes that could potentially have grown bigger had I let them go longer. However, many of the potato plants were ready to be harvested, so I harvested them all. The one thing I did get out of this garden bed was good, healthy soil full of good bugs . If you look at the picture above, you can see how rich the soil is that was left behind. Not a waste at all.
Either way this was a learning experience. I started this blog when I did, before I have my future homestead, because I wanted to share these learning experiences with everyone. I like to learn as much as I can now, before I am on my own homestead so I know more of what I need to do when I get there. Not that things will be perfect, but I will know more than I would have if I chose to wait for the real thing. That, I believe, is the most important step I can take to being successful at homesteading. I hope I am right, we'll find out soon enough.

Either way this was a learning experience. I started this blog when I did, before I have my future homestead, because I wanted to share these learning experiences with everyone. I like to learn as much as I can now, before I am on my own homestead so I know more of what I need to do when I get there. Not that things will be perfect, but I will know more than I would have if I chose to wait for the real thing. That, I believe, is the most important step I can take to being successful at homesteading. I hope I am right, we'll find out soon enough.
Thursday, August 30, 2012
Worm bin or not?
It seems to me that a worm bin is one of those things that you are supposed to have when you are living on any type of organic farm. I built one a couple years ago and I'm not really sure if I want to keep it or not. It seems to me that it is extra work and extra space that is just not necessary. I do get good castings and good compost tea, but in small enough quantities that I can't really do much with it. I could build a much larger bin, but I'm not sure I could then feed it well enough. There are only three of us in the house right now so we really don't produce much scraps. Every time I feed the worms, I have to put all new bedding down which does take up some time as well. I think that throwing all my kitchen waste into my kitchen scrap composter is far less work and I seem to get just as good fertilizer out of it. I also get it in much larger quantities when I go to use it because the can is much larger. If you lived in a place where you didn't really have much yard space, a small worm bin could be ideal, but I think I'm going to just stick to a bigger, "lazier" type composter for my house. Half of the idea of permaculture seems to be less work for more gain anyways. Set things up so that they are efficient and mostly function on their own. The worm bin doesn't do that for me.
Wednesday, August 29, 2012
Seed saving: Squash and Pumpkin

I have to add that after my seeds dried I noticed that most of them were pathetic, flat, non viable seeds. This is because I picked the squash too early. I figured that this could be a problem, but figured I would try anyways. Next time I won't bother.
Tuesday, August 28, 2012
Mead making part two
Now that your fruit and water mixture has been sitting for 7-10 days, its time to strain it and
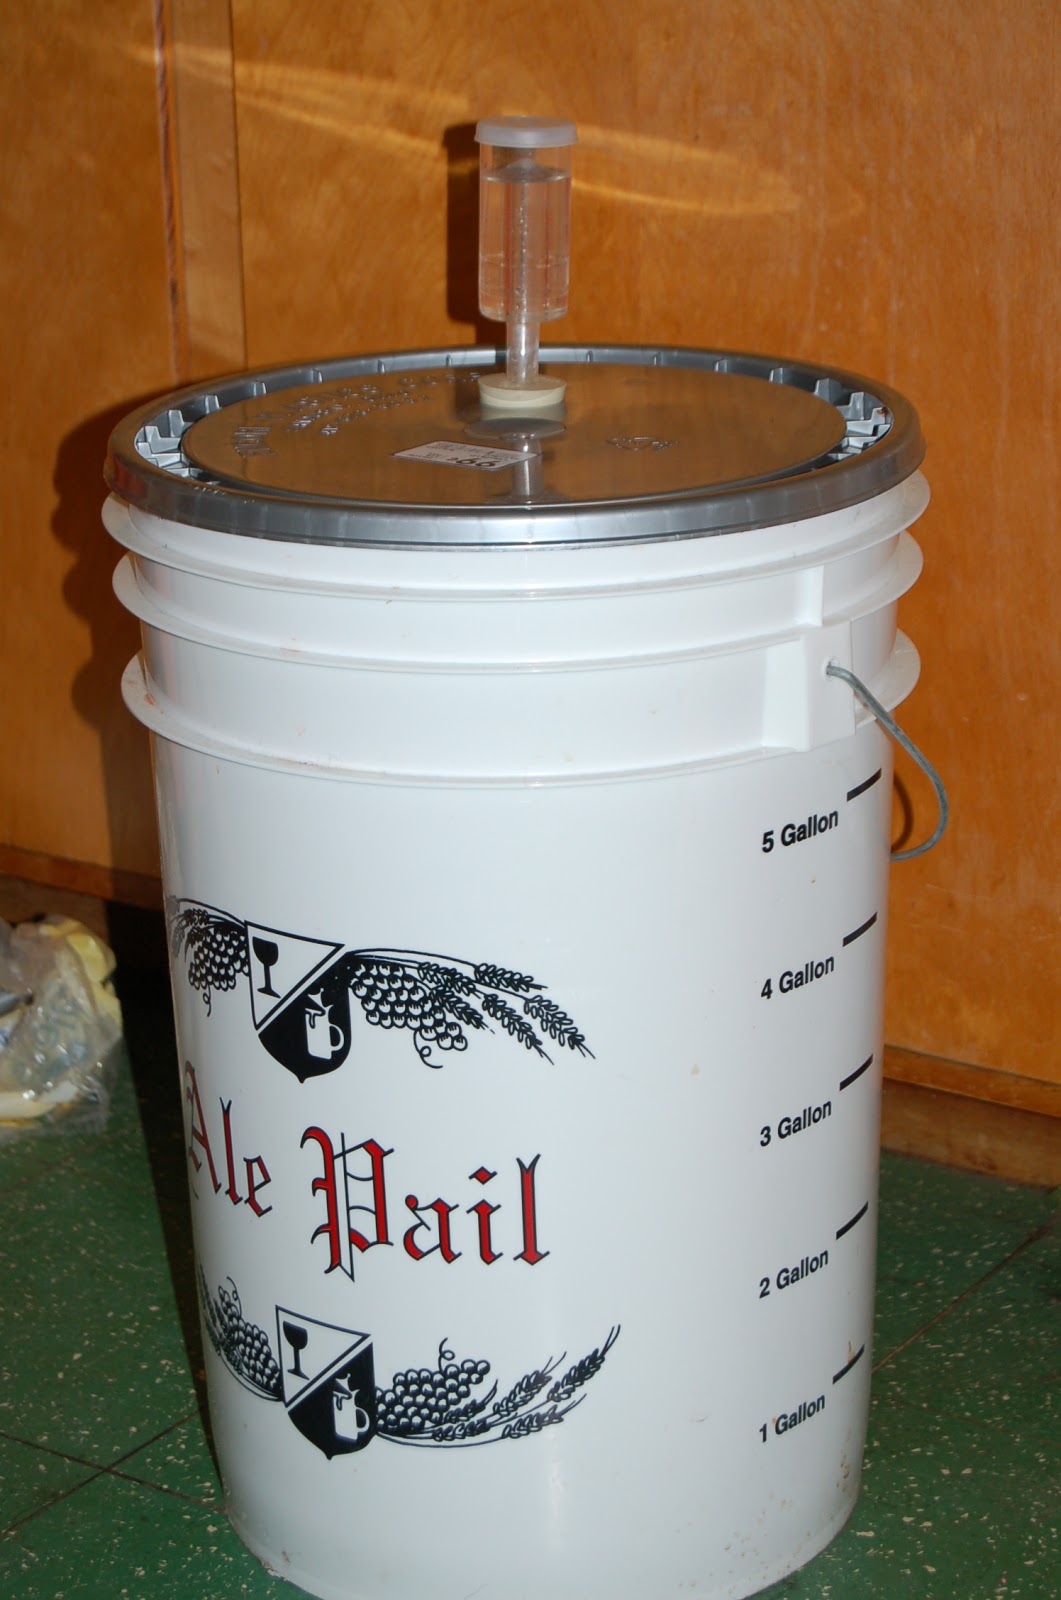
 add the honey and nutrient. I take a large bucket and put a strainer across the top. I then put a piece of cheesecloth over the strainer so that all the little pieces get strained out of the liquid. Once I dump all the liquid through the strainer, I let it sit for a couple hours to be sure that all the juice gets out of the pulp. Next I add the honey. The recipe calls for 3 lbs of honey per gallon of the final amount of mead. Since this is going to be a 5 gallon batch, I would use 15 lbs of honey. However, since watermelon is very sweet, I'm going to try to only add 2 lbs of honey per gallon for a total of 10 lbs. This should make the mead more flavorful and less percent of alcohol. This should still be
 plenty strong enough because the standard 3 lbs per gallon makes fairly strong alcohol. I have yet to actually measure the alcohol content of my mead, but it is obviously quite potent. I like to add the honey when it is slightly warm so that it blends in well. It shouldn't be hot because it will kill the yeast. The next thing you add is the yeast nutrient. The kind I have says to add 1/2 teaspoon per gallon, but a different kind may vary in amount needed. Mix this all up really well and put the lid on the bucket with the airlock in place. At this point you do not want any bacteria getting into your mead because you could end up with vinegar. Let this mixture sit in the bucket for another 7-10 days and stay tuned for the next step!

Monday, August 27, 2012
Harvesting zuchetta
 |
| young rampicante |
Friday, August 24, 2012
My vegetable garden: Trail of Tears, dry pole beans

I grew pole beans last year and did not like the taste at all. I talked to a few other people and it turns out, no one I could find really liked the taste of pole beans. I really like the idea of growing vertical for saving space, so I was disappointed that the beans I could grow vertical weren't really all that good.
Then I discovered Cherokee Trail of Tears beans. They were dry black beans that I could trellis. I am hoping that because they are on a trellis, that they can dry on the vine without getting moldy like many of my dry beans did last year. We had a rainy spell just before the beans were ready for harvest and I ended up loosing some of the beans. So I looked around to see if there were any other kinds of dry beans to trellis, but there were hardly any others. Variety would be nice, but this is a start. We will see how they are doing when it is time to harvest.
The interesting name of these beans also comes with a sad story. The "trail of tears" was the relocation march that the federal government forced the Cherokee people on in 1839. It went from Tennessee to Oklahoma and was a horrible march that lead to much suffering and death to thousands of Cherokees. One of the things these people managed to bring with them was these vining black beans. They were originally called just "bean" but were renamed by the Cherokee people once the march was finally over.
Thursday, August 23, 2012
Cooking in season: Garden Chili

First thing the next day I will turn the low heat back on the tomatoes and cook the beans. Bring them to a boil and them simmer for about an hour. While the beans are cooking, chop up the rest of your vegetables. You can add whatever you have laying around really. I am going to add onion, peppers (hot and sweet), garlic, zuchetta, and some eggplant. I also add chili powder and bulgur wheat. I can't really tell you how much of each I add, I just throw in what I have and then taste as I go to see how the spices are. You can always add more so don't go too crazy initially. Let this cook in the crock pot until dinner time. Be sure to give it a mix occasionally throughout the day. Other vegetables that are good in this chili if you have them are: corn, carrots, parsnips, turnips, spaghetti squash, or anything else really. Just remember when you are adding things that your chili will be different every time, but that is half the fun of making it in season.

Wednesday, August 22, 2012
Kill mulch for bittersweet and ivy?
Around the edges of my garden seem to be a little out of control. I have bittersweet, ivy, and some weird sort of mini rose that are just growing out of control. I considered going crazy one day and digging it all up, but I am about six months pregnant right now so that just isn't going to happen. I have been collecting large cardboard boxes to lay down in the pathways of the garden but I think I could probably use them as a kill mulch for these weeds. I'm not sure that the weeds aren't too much for this sort of a thing, but I am ging to give it a try.
 The spots I am trying to fix are along the side of the house and along the side of a retaining wall. What I did was to dig along the edge of the concrete and bury about four inches of the edge of the cardboard perpendicular to the ground against the concrete. Then I folded the cardboard down so that the rest lay flat on the ground. As the fall comes along I will bury the cardboard with leaves and other yard waste to weigh down the cardboard. Hopefully this will smother all of these weeds and I won't have to spend time cutting them down all next summer. Tune in this spring to see if it worked.

Tuesday, August 21, 2012
Saving seed: Tomatoes

Monday, August 20, 2012
Dehydrating hot peppers

What do you do with hot dry peppers? I was wondering that myself and so I did some looking around online to see if people actually stored hot peppers this way. Lots of people do apparently. Dried hot peppers make an excellent spice. Depending on what kind of peppers you dry, you can make things like chili powder or crushed red pepper to season your meals. Never have to buy these spices from the store again!
Sunday, August 19, 2012
My flower garden: Marigolds

They are cheap flowers to buy and very easy t grow and maintain. I am not good with flowers at all. I kill them most of the time. The only flowers I can grow from seed and get to survive are marigolds and nasturtiums.
There are some types of marigolds that are edible. Therefore you can grow them and add them to a salad to make it pretty. Some people also use them to make things like vinaigrette or even wine. I have yet to taste one myself.
Marigolds grow from spring to fall. They add color and beauty to your garden for until the frost finally kills them off. This also means that you are attracting bees and butterflies to your garden for three seasons with just one type of flower.
The reason I plant marigolds in my garden is that they can be used to deter many types of problematic insects like tomato hornworm, Mexican bean beetle, nematodes, thrips, whiteflies, and squash bugs.
There are many types of flowers you can grow to do the things that I have listed above. One of the more important concepts to keep in mind when setting up something like a permaculture homestead is that many things can have many different purposes. Why do many things that each only serve one function when you can do one thing that can serve many functions?
Saturday, August 18, 2012
Mead making part one
Buying your own adult beverages can be expensive and they are generally full of extra stuff that may not be all that good for you. Just like anything else you buy in the store. I looked in to many different options as to what I might want to make and I have found that the easiest seems to be making mead. It is also very tasty and you get a lot of bang for your buck. This is my third year making it and I have yet to have a batch fail me. I am having plenty of fun altering recipes and trying different fruits. I am going to show you the very basic recipe that I use to make delicious fruit mead or country wine or whatever you might like to call it.
You will need:
A large bucket
A glass carboy
An airlock
A siphon or hose
Wine bottles
Corks
A cork inserter
3 lbs of fruit per gallon
3 lbs of honey per gallon
1 packet of yeast per about 5-6 gallons
Yeast energizer
Water
This should be everything that you need for the entire process. I am just going to discuss the first step today as I start my own batch and follow up with the other steps when I do them for my mead.
 First clean your large bucket really well so that you would eat out of it. I don't sterilize mine, but some people do. The bucket should be about one gallon larger than your carboy. It doesn't have to be, but I found that it is less messy this way. Add about 3 pounds of fruit to the bucket per gallon of mead you want. Strong tasting fruit does not require as much and mellow fruit may require more. Mash it really well. The picture is my mashed up watermelon in the bucket. Add boiling water to cover the fruit. You want plenty to keep the fruit covered but not so much that the bucket is full. It will overflow once the fermentation starts and there will be a large mess and many fruit flies. I know this from experience. You also want a little less than will fill your carboy for the same reason. You can add more water as we go. Once the water cools to room temperature, add the yeast. Too hot and the yeast will just die. Too cold and they won't be as active. Then we wait about a week.
The specific recipe that I did is as follows: 15 pounds of watermelon in a 6 gallon bucket. I added 2 gallons of boiling water. Later tonight once the water cools I will add one packet of montrachet yeast and mix it up really well. Most likely next Sunday I will go on with step 2.
You will need:
A large bucket
A glass carboy
An airlock
A siphon or hose
Wine bottles
Corks
A cork inserter
3 lbs of fruit per gallon
3 lbs of honey per gallon
1 packet of yeast per about 5-6 gallons
Yeast energizer
Water
This should be everything that you need for the entire process. I am just going to discuss the first step today as I start my own batch and follow up with the other steps when I do them for my mead.

The specific recipe that I did is as follows: 15 pounds of watermelon in a 6 gallon bucket. I added 2 gallons of boiling water. Later tonight once the water cools I will add one packet of montrachet yeast and mix it up really well. Most likely next Sunday I will go on with step 2.
Friday, August 17, 2012
Saving seed: Nasturtium

Thursday, August 16, 2012
Growing grain: Amaranth

What is amaranth anyways? Amaranth actually has a few different reasons to grow it. If you get the leaves when they are young and tender they are good for salads. They are also supposed to be good as a steamed vegetable. I didn't get to try it this year because I wasn't convinced that the amaranth I planted was actually growing. The little red plants didn't sprout until long after I planted them. The beautiful, bright flowers are excellent for attracting bees and butterflies to help pollinate your garden. Some people use these flowers in bouquets or dry them for other decorations. I grew amaranth this year as a potential grain source. The seeds this plant produces can be ground to make a flour that is high in protein, fiber, antioxidants, and iron. They also contain vitamin E and lysine. I had tried growing wheat in the past, but the effort to gain potential was too low for me. Amaranth seems to be less effort for a far richer grain source.
I specifically grew Hopi red dye amaranth. As you can see, the whole plant is that beautiful red color. The Hopi indians used this grain to make a ceremonial red cornbread. The plants brilliant red color can be captured in a red food dye. There are many other types of amaranth as well, this is just the one that caught my attention. If this pans out as a good grain source, I will likely try other types.
My plans for this year are just to harvest the seeds from the few plants I got and then to plant them next year. I will likely start them inside and work a little harder at getting the plants off to a good start. Hopefully, these plants will be as valuable as I think they may turn out to be.
Subscribe to:
Posts (Atom)